


We asked our friends over at Biscuiteers for their top-tips on how to ice our biscuits like a pro at home. Here's what they had to say...
We might be biased, but here at the Ministry of Biscuits in London we think beautifully hand-iced biscuits are perfect for every occasion. From party favors, to gifts and extra special surprises, biscuits are always best!
So, if you want to wow your mum with some homemade professional looking hand-iced biscuits this Mother’s Day - you’re in the right place. Our icing experts have shared their top five tips and tricks to help you bake and ice professional looking biscuits, just like the ones we make at the Ministry!
Tip 1: Keep your dough chilled
First things first, we recommend chilling your biscuit dough before cutting and baking it. Cover or wrap your dough in saran wrap before placing it in the fridge for around 20 minutes to firm up. This will make the dough firmer, meaning your biscuits will better retain their shape when baking in the oven.
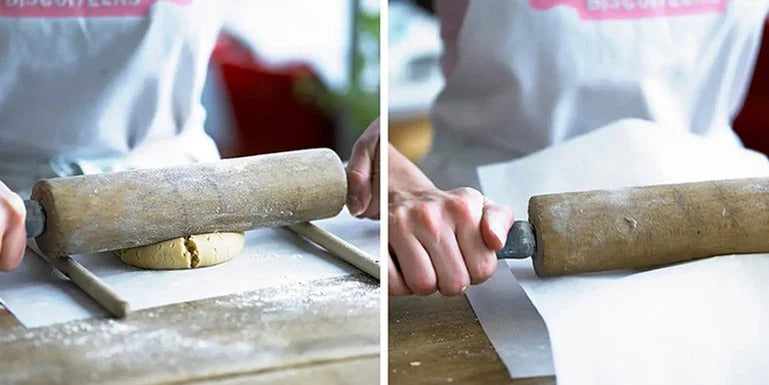
You can now roll out your biscuit dough. At the Biscuiteers bakery we roll the dough between two pieces of parchment paper, this method also helps keep your area clean.
If you want help achieving an evenly rolled layer of dough you can use rolling guides. These can be bought from specialist shops, alternatively you can improvise by using a couple of wooden spoons, just like the image below.
Tip 2: No cutter? No problem
If you don’t have the right shaped cutter for your biscuits, don’t worry! You can either draw your shape on a piece of tracing or parchment paper, or print out the shape on a piece of paper.
Once you've got your print or drawing you can place the paper on top of the dough, and cut around the shape with a knife.
 Tip 3: Always dry your flood icing in the oven
After applying flood icing to a biscuit, we always recommend drying the icing out using the oven. The heat helps set the biscuits so they have that glossy and smooth effect on top and allow for much more precise line icing.
To do this, put your biscuits on a tray and into the oven at approximately 120 degrees Fahrenheit, or the lowest setting it can go, for around 30 minutes. This allows the flood icing to dry out - otherwise it could take up to 12 hours!
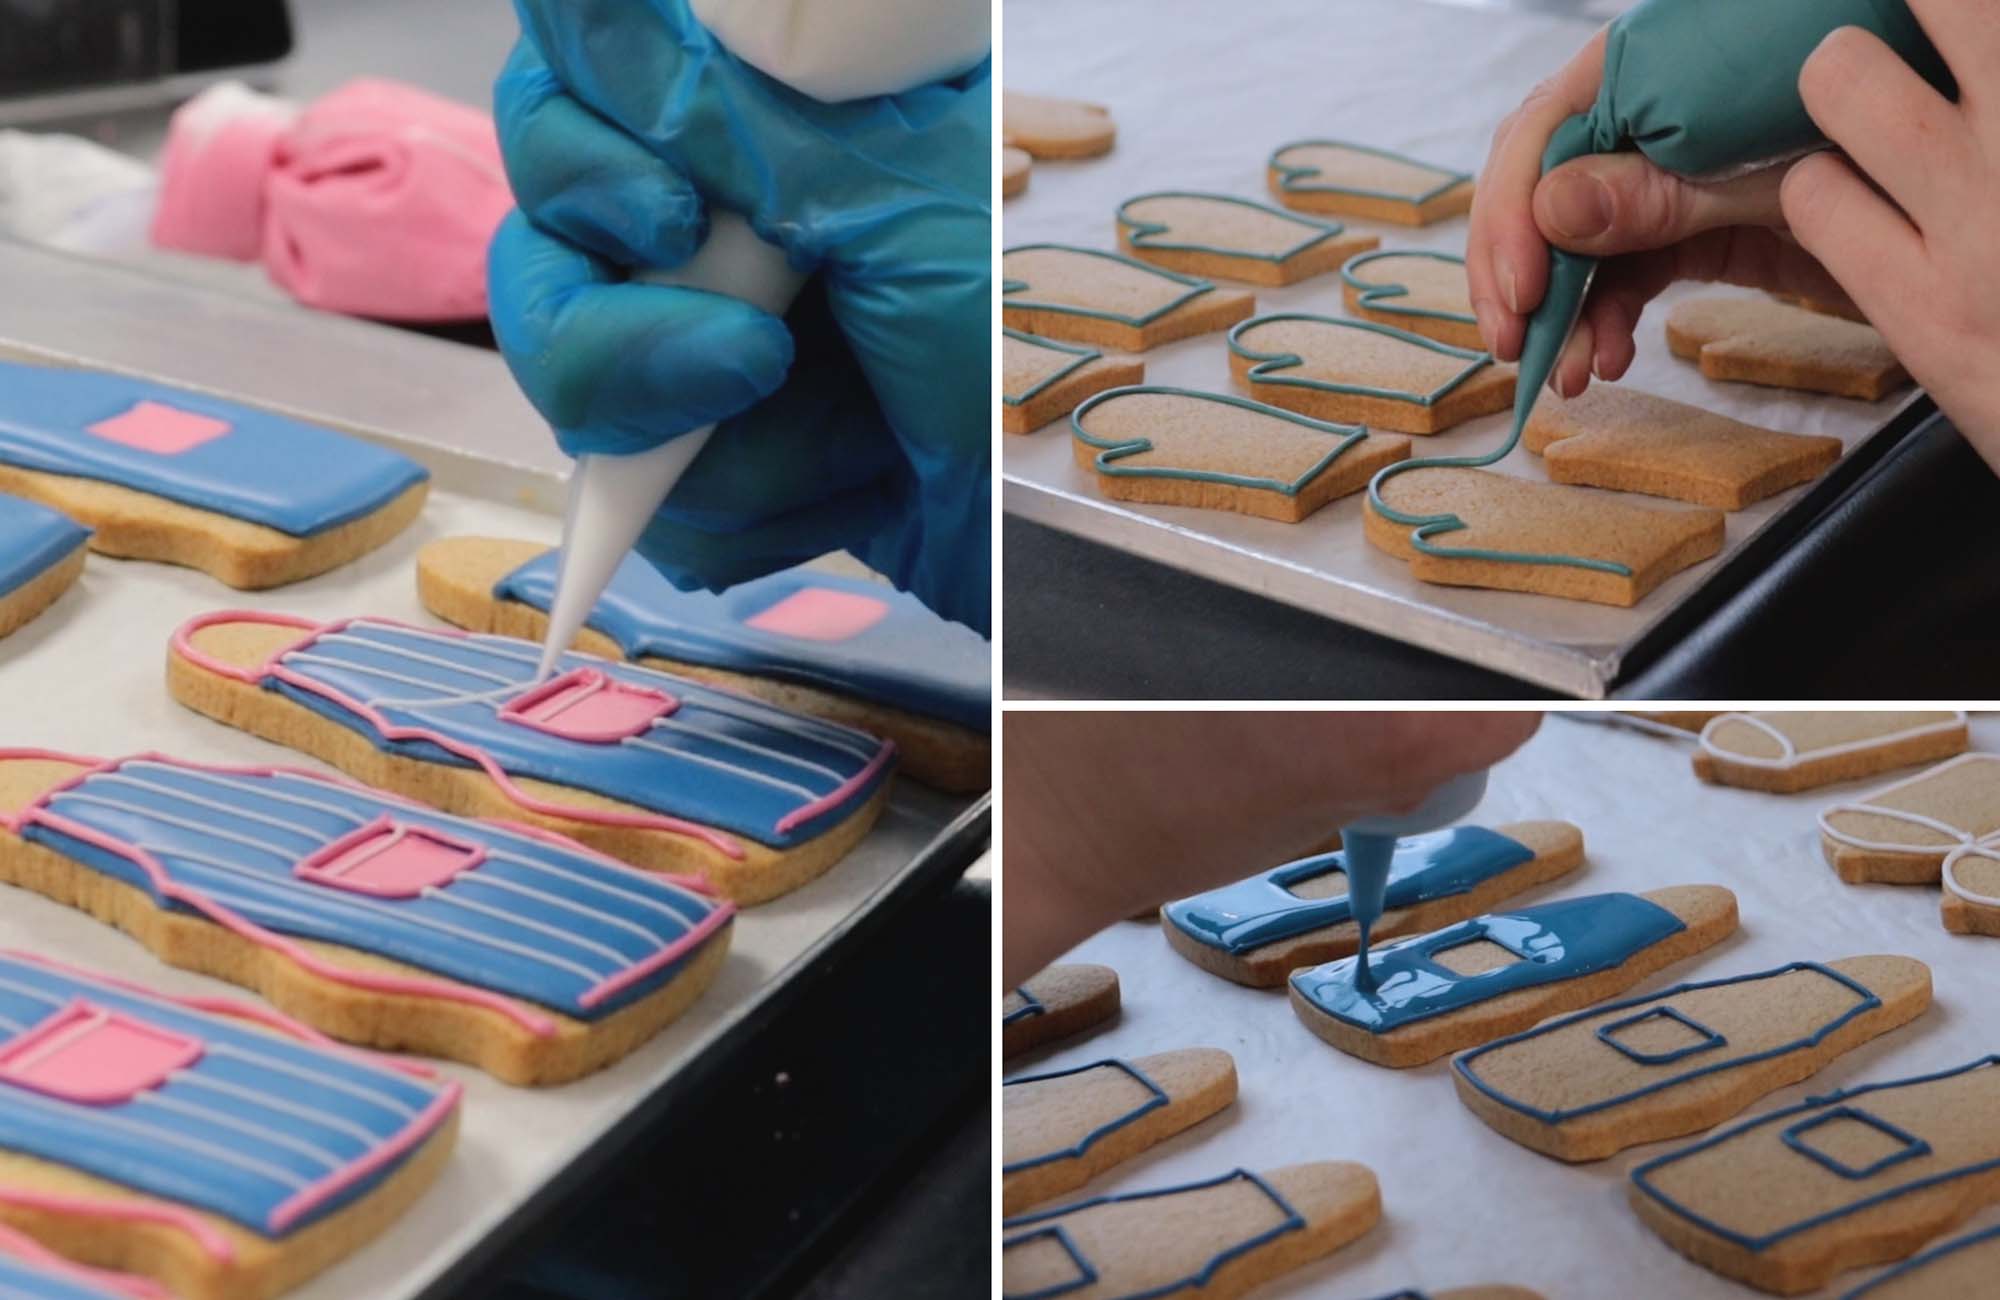
Tip 4: Re-outline the flood icing once dry
Once your flood icing has dried, we often use line icing to go back over the outlines & shapes you’ve created with your flood icing. This creates a much cleaner and more consistent finish to your designs, helping your biscuits look for uniform.
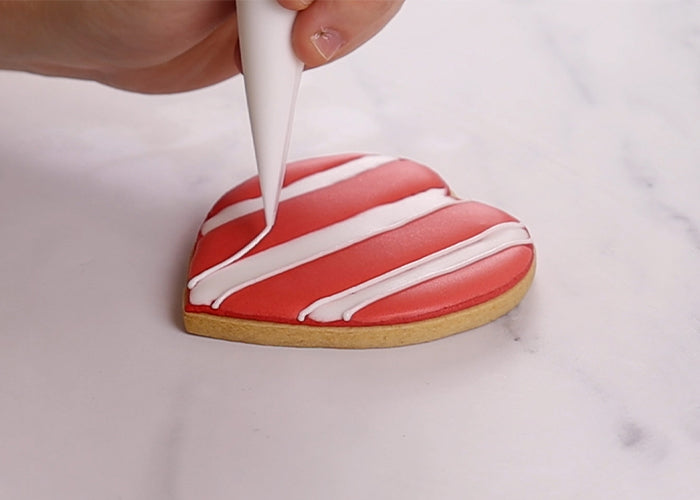
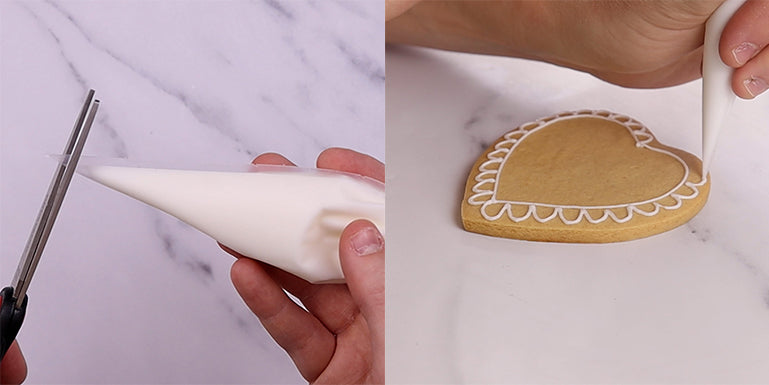
Tip 5: Keep the tip of the icing bag as small as possible
Last but not least, our final tip is to keep the tip of your piping bag as small as possible when adding details and decoration to your biscuit.
By cutting a very small part of the end of the piping bag, you’ll be working with thinner lines of icing, this means you’ll be able to create much more dainty details when icing your biscuits.
 And there you have it! Five top tips, straight from the Ministry of Biscuits. You should now have the perfect canvas for icing and decorating biscuits, ready to impress Mum.
For more perfect present ideas this Mother’s Day why not check out our brand new collection of biscuits made in collaboration with Sophie Allport exclusively for Mum's big day.
